The settings you should change immediately after buying a new TV
The default settings aren't necessarily the best.

It's finally a good time to make the jump to a 4K TV. Prices have come down, HDR is up to snuff, and there are a bevy of great models to choose from. But once you bring your new TV home, you may want to take a trip through its settings and tweak a few in order to get the best possible picture.
If you peek into your TV's settings, you'll see a lot of features with catchy names — like "Ultra Black" or "Live Color." Many of these features, however, are marketing gimmicks designed to sound impressive, one-up the competition's spec sheets, and make the picture pop next to other TVs in brightly lit showrooms. In fact, many of them actually remove detail from the picture or cause distortions and artifacts that degrade picture quality. Here are the settings you'll want to turn off for the best possible image.
The settings you should probably disable

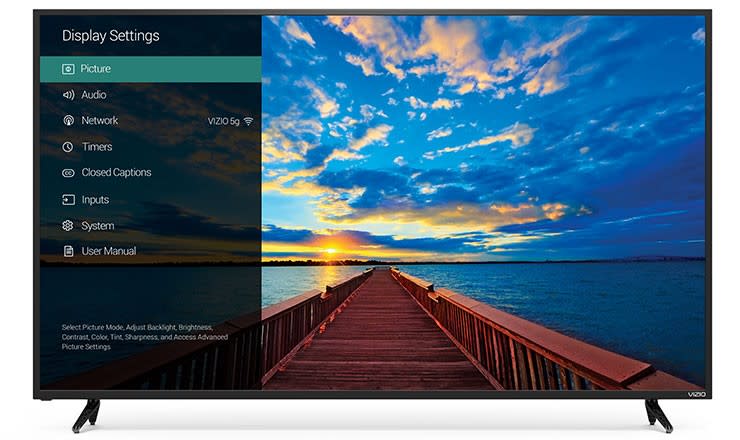
Jump into your TV's settings and head to the picture settings menu. Before you start tweaking, set the display's mode to "Movie" (this is sometimes called "Cinema," "Expert" or "Custom"). This will ensure that your basic brightness, contrast and color settings are as close to accurate as possible — at least, without going through a time-consuming calibration.
After that, you'll want to head to the advanced picture menus to disable your TV's post-processing features. In some cases, choosing that "Movie" picture mode may disable some of the below settings automatically — but it's still a good idea to scour the settings menu yourself. Note that these recommendations apply to both standard and HDR TVs.
Dynamic Contrast: Sometimes called "Contrast Enhance," this makes dark areas darker and bright areas brighter. That may make the picture "pop" a bit more, but in doing so, it'll often crush blacks and whites, reducing the detail of the scene. It can also introduce color banding artifacts. Turn this off and you'll ensure you're getting the maximum amount of detail in the picture.
Black Tone: Similar to Dynamic Contrast, this attempts to make black areas look darker — but you can't actually make your TV's blacks blacker than they already are. Instead, this will make dark gray areas black, which will cause you to lose detail. It's best to leave this off.
Black Detail: This is the opposite of Black Tone — it attempts to enhance details in dark areas by brightening them. You might think that's a good thing, but in fact, it just causes the opposite problem: By lightening dark areas, you're more likely to introduce artifacts.
Edge Enhancement: This feature attempts to make the image look a little sharper. That sounds good, but oversharpening can also create artifacts, like a "halo effect" around edges. In most cases, this should be left off.
Live Color, HDR+ Mode and Flesh Tone: All of these features introduce post-processing designed to enhance the color in some way. Live Color makes colors more saturated, HDR+ Mode attempts to make standard content look more like HDR, and Flesh Tone attempts to make skin pop. But if the movie you're watching was properly mastered, the color should be fine; turn these off for the most natural-looking image. (Note that "Color Temperature" should not be lumped in with these features. You should leave that set to the Movie mode's default, usually "warm.")
Super Resolution, Reality Creation, Smooth Gradation and other Noise Reduction features: These attempt to make low-quality content look better, sharpening the picture and removing noise and other artifacts caused by digital compression or analog conversion. For high-quality content, like Blu-rays, these are best left off, since they can soften the picture. That said, you may want to turn them on for old DVDs (or even cable TV, if you find that it looks better).
Motion Interpolation: Every manufacturer has its own name for this. It goes by "Motionflow" on Sony TVs, "Motion Rate Supreme" or "Auto Motion Plus" on Samsung TVs, "TruMotion" on LG TVs and "Smooth Motion Effect" on Vizio TVs. Despite the different names, they all do essentially the same thing: generate more frames in between the already existing frames, for super-smooth motion. This is what causes that weird "soap opera effect" that so many people hate, and it can also introduce artifacts, so we recommend disabling it — unless you're one of those people who actually enjoys it.
Auto Picture Mode: This is a feature on some Sony TVs that attempts to change your TV's picture mode automatically based on what it sees on the screen. It's generally a good idea to leave this off; the settings we recommend in this guide should work well no matter what you're watching.
Note that not all TVs will have all these settings; cheaper panels, in particular, will have far fewer options. But this list should cover most of the image-processing settings you'll see on popular TVs from big brands. At the end of the day, it's all about what looks best to you. But if you want the most detail and the most accurate colors, as the filmmakers intended, we recommend disabling as many of these features as you can.

The settings you'll need to try for yourself

Disabling all of the post-processing is the easy part. There are a few settings on your TV that can make the picture look much better (or worse), but which setting you should use depends a lot on your TV and what you're watching. Here are a few settings you may need to experiment with:
Backlight: Most TVs have both a Backlight and a Brightness setting, and they do very different things. You should leave "Brightness" alone unless you're calibrating your TV, as it affects the black levels. Backlight, however, you can set to whatever you want, as it just changes how bright your TV is. You'll probably want it higher during the day, and lower if you're watching in a dark room. (Your TV may also have an Energy Saving feature that attempts to adjust the backlight automatically.)
HDMI Range, Color Space, RGB Range or Black Level: This feature determines how the color signals sent to your TV are processed. If your TV lets you set this to Auto, leave it there. Otherwise, it should almost always be set to "Limited" (or "Low" in the case of some Samsung TVs). Make sure the devices plugged into your TV, like your game console or set-top box, are also set to "Limited." "Full" is intended only for those who are using their TV as a PC monitor. (Note: On Sony TVs, Black Level is the same as Black Tone, and should be left off.)
24p Playback: Often called something like "Real Cinema" or "Pure Cinema," this feature plays movies at 24 frames per second instead of using 3:2 pulldown. This is a rather complicated topic, but in short, it may remove some stutter when watching movies and TV shows. Some TVs do this automatically with no settings toggle needed, and some can't do it at all. But if this setting exists, you'll want to turn it on.
Local Dimming: This feature attempts to dim some of the LED lights in your TV to get darker blacks in certain parts of the picture. When implemented properly on full-array TVs, this feature can be great. On other TVs (especially edge-lit ones), it can lag behind the picture, darken certain areas too much, or cause flickering. Try this both on and off to see which you like better. This is called "Xtreme Black Engine Plus" on Vizio TVs. Sony TVs will have this, along with an "X-tended Dynamic Range" feature that does something similar with bright whites. Again, try it on and off to see what you like.
Game Mode: Intended for video games, this setting lowers the input lag of your TV to ensure that your button presses are registered onscreen as soon as possible. On some TVs, this comes at the expense of image quality. Try it on your TV — if it lowers the image quality of movies noticeably, you'll want to turn it on only when you game.
Black Frame Insertion and PWM Dimming: Known as "Clear Action" on Vizio TVs, "Clearness" on Sony TVs, "LED Clear Motion" on Samsung TVs and "Motion Pro" on LG TVs — you'll usually find this as a sub-setting under the Motion Interpolation setting described above. This feature inserts black frames in between the existing frames of the content you're watching, which should reduce motion blur without introducing a strong soap opera effect. It will, however, cause the screen to dim considerably and flicker, which some people may not like, so try it on and off to see what you prefer.

There are hundreds of different TVs out there, and it's impossible to cover every single setting you may come across, but this should give you a good idea of how to tweak your TV for close-to-optimal picture quality, without having to hire a calibrator or go through a time-consuming process yourself. If you find a setting that isn't on the above lists, look it up online and see what people recommend — or sound off in the comments below.
Images: Vasquez / EyeEm via Getty Images (Color test); Will Lipman / Engadget (OLED starry sky); Vizio (TV settings menu); gorodenkoff via Getty Images (TV store)

